Updated Feb 18, 2026
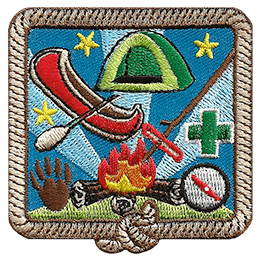
This kit was created to assist you in completing the Outdoor Skills Challenge Kit program. Included are facts, stories, crafts, games, recipes and information that can be copied and distributed to the participants working on this kit.
While camping, there is nothing better than sitting around a fire, singing songs and watching skits. However, having a fire isn’t a right but a privilege, and it comes with rules and regulations that must be followed to keep yourself and others safe.
Safety Tip: Never leave your fire unattended, and always keep it at a manageable size.
If the fire is not cold to the touch, repeat Steps 2-4.
The following items are things that you should not burn. Ensure you always dispose of these properly rather than placing them in your campfire.
Throughout this kit, your group may be asked to tie certain knots to complete crafts, activities and games. Review the following knots with everyone so that they can all enjoy completing the tasks outlined in this challenge kit.
Before you start tying knots just yet, there is some terminology that you have to learn to understand these instructions. A rope can be broken down into three sections: two ends and a standing part. Some knots are formed by two ends (reef knot), some by the end and the standing part (bowline), and some by the standing part alone (sheepshank).
Although some knots may appear difficult, they can all be broken down into three basic terms: bight, standing part, and free/working end. A bight is any curved section between the ends of the rope. The standing part is the section of the rope not involved in the knot, and the free/working end is the end of the rope that you are using to make the knot.
You also need to know the difference between an overhand loop and an underhand loop. An overhand loop is where the end of the rope comes above the standing part to form a loop, and an underhand loop has the end of the rope going under the standing part to form a loop.
There is such a fish that can walk on land! It is called a mudskipper, and they use their pectoral fins to hoist themselves up and crawl along the earth, climb roots, and defend their territory. They breathe air through their skin as long as the surface of their skin and the lining of their mouths are moist.
This is a good knot for joining two ends of ropes or lines.
This knot is a secure slip knot (also called a hitch), which you can use to fasten a rope to a ring or pole. As the name implies, the Half-S is identical to the first part of the “S” knot shown before.
This knot is known for its usefulness in raising logs or dragging them along the ground, or tying to a post or spar. Unlike the regular timber hitch, it will hold under slack conditions.
The Reef knot, better known by its more common name, the Square knot, is one of the most useful knots for first aid and tying bandages. It lies flat, holds well, and can be easily untied. However, do not use it if someone’s life is at stake. The Reef knot holds well but is not secure enough to be dependable.
This knot is used to tie fine lines together, such as a fishing line.
The Clove Hitch is a common knot for Guiding because it is used to start and finish most lashings.
This knot is commonly used for tying around packages or keeping a balloon from flying away from you.
The bowline is a rescue knot for tying a loop to throw out to a drowning person or used to secure yourself during mountain climbing.
The bowline can also be explained like this:
When hibernating in the winter months, animals slow down their heart rate and breathing as well as lower their body temperature in order to conserve energy during the time of year when food sources are scarce and the weather is extra chilly.
Don’t stop here! Ask your group if they know of any other constellations, or research some of the ones you grew up looking for as a child as well.
| Big Dipper | Also known as the plough, it is a grouping of seven of the brightest stars that make up the Ursa Major constellation. It is also used as a reference for finding the North Star by following the two stars on the “cup” of the Big Dipper. |
| Little Dipper | It is a grouping of the seven brightest stars that make up the Ursa Minor constellation. The star at the end of the Little Dipper is the North Star or Polaris. |
| North Star | Also known as Polaris, rarely ever moves and is the last star on the end of the Little Dipper’s handle. |
| Cassiopeia |
It is easily recognizable due to its distinctive “W” shape and is said to represent the vain and boastful wife of King Cepheus of Ethiopia, who lies next to her in the sky. Cassiopeia was punished by the sea god Poseidon for claiming to be more beautiful than the sea nymphs and tried to sacrifice her daughter, Andromeda, to the monster sent after her by Poseidon. She is depicted as sitting on her throne in the sky, and as an added punishment, was condemned to circle the celestial pole forever, part of the time hanging upside down in an unseemly posture. |
| Ursa Major |
Also known as the “Great Bear,” it is a constellation visible throughout the year in most of the northern hemisphere. The seven stars from the Big Dipper make up the backside of the bear, while the rest of the animal is made up of fainter stars. In Greek mythology, Zeus (the king of the gods) lusts after a young woman named Callisto, a nymph of Artemis. Hera, Zeus’s jealous wife, transforms the beautiful Callisto into a bear. Callisto, while in bear form, later encounters her son Arcas. Arcas almost shoots the bear, but to avert the tragedy, Zeus turns them into bears and puts them in the sky, forming Ursa Major and Ursa Minor. Callisto is Ursa Major, and her son, Arcas, is Ursa Minor. |
| Ursa Minor | Also known as “Little Bear,” its bear tail is represented by the Little Dipper grouping of stars. Ursa Minor is said to represent Arcas, the son of Callisto, who was turned into a bear and placed in the sky by Zeus so that he would not shoot his mother in her bear form. Please see also Ursa Major. |
| Pegasus | It is the seventh-largest constellation in the sky, with the horse's body represented by the “square of Pegasus.” However, only the front half of this mythological creature is shown flying in the sky. Pegasus is named after the winged horse with magical powers that was ridden by the hero Bellerophon. |
| Orion | It is a large constellation with three distinctive stars making up “Orion’s Belt.” This constellation represents the son of Poseidon, the sea god, and Euryale, the daughter of King Minos of Crete. He was given the power to walk on water and, in ancient legends, is said to be the tallest and most handsome of men. |
| Hercules | It is a constellation named after the Roman mythological hero, adapted from the Greek hero Heracles. In the night sky, he is said to have one knee bent and one foot over the head of a slain dragon. |
| Crescent Moon | It is halfway between a half moon and a new moon, or between a new moon and a half moon. |
| Full Moon | Appears as an entire circle in the sky. |
| Gibbous Moon | It is between a full moon and a half moon or between a half moon and a full moon. |
| Half Moon | Looks like half a circle. It is sometimes called a quarter moon (this Moon has completed one-quarter of an orbit around the Earth from either the full or new position, and one-quarter of the moon’s surface is visible from Earth). |
| New Moon | It is the phase of the moon when the moon is not visible from Earth, because the side of the moon that is facing us is not being lit by the sun. |
Knives are a handy tool when you're out in the wilderness and can be used for many different purposes. However, they can also be dangerous if used improperly. The following are some rules and precautions you should review with your group before allowing them to use knives at camp.
You are required to have separate licenses for freshwater and saltwater fishing. Both can be purchased at sporting goods stores.
While out on hikes around your campsite, you may see some of these tracks on the ground. Help your group identify different types of animals around your campsite. Also, after identifying the tracks, let them know the different types of precautions they should be taking in order to not attract wildlife.
| Bear | Bears are large creatures that vary in colour depending on the breed and can be brown, black, or cinnamon. They swim, climb trees, and run fast. They normally hibernate in the winter in dens in sheltered areas such as caves, brush piles, or even sometimes in tree holes. They eat both meat and vegetation, such as fish, insects, grasses, roots, and berries. |
| Beaver | The largest rodent in North America, the beaver can reach over one metre in length. They are notorious for their orange buck teeth and large, flat tail that is shaped like a paddle. They do not hibernate in the winter and build dams and lodges - large cone-shaped piles of branches in the middle of a lake or pond. They are vegetarians and eat such things as shrubs and cattail shoots. |
| Rabbit | Rabbits range in a variety of colours from grey, brown, and white, and some even change colours in the winter depending on the breed, so they can camouflage in the snow. They do not hibernate in the winter and eat anything leafy, roots, and willows. |
| Raccoon | Raccoons are known for their mischievous black mask. They also have an average of 5-10 bands running across their tail in brown or black. The body of a raccoon can be grey, black, brown, or even albino. They live in a wide range of habitats requiring only a place to drink, food, and somewhere safe to live in their den. They eat a range of food from birds, frogs, fish and fruit |
| Squirrel | Squirrels make high-pitched chirping sounds and most commonly live in trees or nest holes, but certain breeds, such as ground squirrels, may also burrow into tunnels for their home. They eat nuts, leaves, roots, seeds and also catch and eat insects and caterpillars. Tree squirrels will also eat bark, eggs, and baby birds. They most commonly hibernate in the winter. |
| White-Tailed Deer | The white-tailed deer is tan or reddish brown in summer and greyish brown in the winter. When it senses it is in danger, it raises its tail, called “flagging,” showing the white patch on the underside of its tail to signal an alarm to any nearby deer. It is a vegetarian and eats things such as nuts and plants. White-Tailed Deer are also very good at jumping and can jump around nine metres in length, and over two and a half metres high. |
| Wolf | The wolf is the largest member of the dog family and can be many colours from white to black, but is normally grey. Wolves live in packs of 3-7 with one dominant, or “alpha” male, and each wolf has its own place within the hierarchy. They hunt as a pack and take turns chasing their prey. They are mainly carnivores but will eat other foods, such as berries, but normally eat elk and moose. |
| Item | Why It's Needed |
| Dryer Lint | Dryer lint is not only great to use as kindling, but is also easy to find in any household. It easily starts fires if it is kept dry and should be stored in a plastic bag while in your first aid kit. |
| Matches | Having kindling is one thing, but you also need a way to light your fire. Having matches handy and storing them in a waterproof container will ensure that you always have two of the three items needed to create a warm, toasty fire! |
| Band-Aids | Even small cuts can get infected if you are outside and are in contact with dirt and grime. Having Band-Aids will ensure that small wounds can heal more easily. Also, be sure to pack the next few items for even bigger injuries! |
| Gauze | For injuries that cannot be covered with a simple bandage, gauze is helpful for wrapping around wounds that need pressure applied to them or covering a large area. |
| Adhesive | It is integral in making a gauze stick so that the injury you’ve just wrapped up won’t come apart and cause the wound to start bleeding or get dirty and infected. |
| Tensor Bandages | This type of bandage comes in handy if someone in your party sprains a wrist or an ankle, cracks a rib or does anything to their body and is in need of assistance to ensure it doesn’t move while it's healing. |
| Disinfecting Wipes | When cuts and scrapes, etc. happen, having a simple way to disinfect them is key. Keeping wipes in your first aid kit will ensure you have single-use wipes that can be ripped open when needed and won’t spill or dry up over time. |
| Hand Sanitizer | Hand Sanitizer is helpful if you don’t have access to soap and water in order to ensure your hands stay clean. |
| Polysporin | Polysporin is an antibiotic ointment that will help keep wounds disinfected so that they do not get infected and speed the healing process. |
| Granola and/or Fruit Bars | It is much needed if you are ever lost and do not have access to food, as it will provide much-needed energy and should keep for a number of months. Always check the expiration date when taking your first aid kit on a trip; however, just in case, |
| Compass | A compass is a navigational instrument that will help you determine what direction you need to go. However, if you do not have access to a map and are lost, it is best to stay in one place. |
| Backroads Map | It will come in handy if you’ve packed your compass. If you find yourself lost, it is always best to stay in one place until help arrives. However, if you are sure of where you are located and are comfortable using a map, it may help you find your way home or at least to a major road where a vehicle may be flagged down. |
| Afterbite | It is an ointment placed on the skin that helps soothe the annoying itch that comes from mosquito bites or stings from wasps and bees, etc. |
| Glowstick | It will help light your way in the dark if you don’t have a flashlight and usually lasts for around 12 hours. |
| Non-Battery Powered Flashlight | Suppose you can, be sure to pick up a flashlight that doesn’t require batteries at your local outdoor needs store. Something that needs to be shaken or wound in order to work may seem silly, but it could mean the difference between fumbling around in the dark or seeing your surroundings while lost. |
| Rope | This can be used along with your knife to build a lean-to or a tepee so you can have shelter until help arrives. |
| Utility Knife | It will help you cut rope if needed to make shelter, as well as cut any plants you find in the wilderness that can be eaten. It can also be used to make kindling from wood. |
| Affliction | Remedy |
| Small Cuts |
|
| Burns |
|
| Sun Stroke |
|
| Insect Sting |
|
| Dehydration |
|
| Mild Frostbite |
|
According to the Nature Conservancy of Canada, there are approximately 380,000 black bears and 26,000 grizzly bears in Canada.
The following list of items is a suggestion to use when planning a camping trip for the weekend.
Ask your group about the different types of clothes they think they should pack as well.
| Weather | Clothing |
| Spring |
|
| Summer |
|
| Autumn |
|
| Winter |
|
While camping with your group, everyone should be involved in helping out - not just the adults. Use the following chart to help your campers choose which duties they’d like to assist with. Ensure everyone understands when and how to do their assigned duty, and depending on their age, have an older camper supervise if needed.
Feel free to add other specific duties as you see fit, as well, to personalize them to your camping trips.
| Duty | Friday | Saturday | Sunday |
| Cooking Breakfast | |||
| Washing Dishes | |||
| Drying Dishes | |||
| Cooking Lunch | |||
| Washing Dishes | |||
| Drying Dishes | |||
| Cooking Supper | |||
| Washing Dishes | |||
| Drying Dishes | |||
| Lighting/Putting Out Fire | |||
| Chopping Wood | |||
| Cleaning Up Camp | |||
| Tearing Down Camp | X | X | Everyone |
Items Needed
Practice the following strokes with the canoe on land before bringing any inexperienced canoeists out on the water.
Once you have finished this challenge kit, use code ECK014 for 20% off the Outdoor Skills badge!

This Meeting Plan was researched and written by our intern Nicole Fitch.
Subtotal 0