Be A Clown Challenge Kit Activities

Updated Jun 30, 2025

This kit was created to assist you in completing Be A Clown Challenge Kit. Included are facts, stories, crafts, games, recipes and information that can be copied and distributed to the participants working on this kit.

View Be A Clown Teaching Materials

Craft: Clown Hat

Materials

  • Big sheet of construction paper
  • Coloured paper
  • Scissors
  • Stapler
  • Glue
  • Ribbon or string
  • Pompom
  • Compass (optional)

Instructions

  1. Begin by making a cone hat. Take a big sheet of construction paper and draw a half circle— using a compass or a pencil tied to a piece of string will make this easier.
  2. Cut out the half circle, then fold the half circle into a cone. Use a flat surface to level the base of the cone, and make sure that the cone is wide enough to fit on your head. When the cone is the width that you want it to be, staple the base of the seam.
  3. You can remove the staple and readjust the width of the cone until you are satisfied. When the cone is ready, glue along the seam and let it dry. There you have your basic cone hat!
  4. Now for the fun part—decorating! Cut out circles from the different coloured paper and glue them to your hat. You can also use glitter, stickers, or any other kind of decorating material you would like.
  5. Take ribbon or string and cut it into strips. Glue the ribbon or string along the inner edge of the hat’s base. Cover half of the hat’s base—you want to make sure that you can see from one half!
    1. Tip: Curling ribbon using a pair of scissors will make it look more like funky clown hair.
  6. Top your clown hat off by gluing a pompom to the top!

Craft: Make Your Own Clown Wig

Materials

  • Mesh produce bag
  • Yarn
  • Cardboard

Instructions

  1. Take a mesh produce bag (the kind that holds oranges at the supermarket). Cut off the label, but be careful not to unravel the bag. Roll up the edges of the bag where you cut it; this fold will stop your bag from unravelling. Place the bag on your head and make sure that it fits over your scalp. If the bag is too big, roll the edges up further.
  2. When you have determined the right size of your bag, it’s time to handle the hair! Take yarn in as many colours as you would like and wrap them around a piece of cardboard. The side of the cardboard that you wrap the yarn around should be half the length that you want your strands of hair to be. Cut the yarn along one edge of the cardboard so that your strands of hair are the same length.
  3. To secure the hair to the mesh bag cap, just tie the pieces of yarn to the mesh. Tie the knots in the middle of each strand of yarn so that two strands of hair hang from each knot. Begin by tying the knots along the rolled edge of the bag so that the roll stays in place, and then work your way up to the tip of the cap. The result will be a big mop of clown hair!

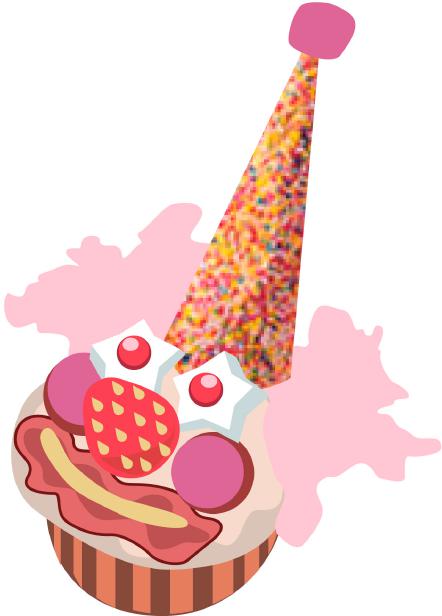
Tip: If you have trouble keeping your clown wig on your head, try attaching a thin length of elastic to either side of your wig. This can be used as a chin strap, like on a party hat.

Craft: Clown Clothes

Materials

  • Borrowed or old shirts, pants, jackets, gloves, shoes, etc. from parents
  • A belt
  • Scrap material (optional)
  • Sewing needle (optional)
  • String (optional)

Instructions

  1. If your parents have some shirts, pants, coats, shoes, or any clothes that they don’t mind lending you, you can easily use them as clown clothes! Remember, anything baggy will look ridiculous, which is exactly what a clown wants!
  2. Use a belt to keep up baggy pants—unless you want to make them drop part of your act!
  3. If your parents happen to have some clothes lying around that they don’t want anymore, you can decorate them to make them look even more silly—just be sure to ask your parents first!
  4. You can take scrap pieces of material and sew patches into your pants, shirts, and coats to achieve a Happy Hobo look. Or, you could sew triangles and other shapes to try and go for a Joseph Grimaldi White Face Clown look.
  5. There are no rules with clowning, so get creative.

Craft Overview

  • Look Like A Clown
    • Make Your Own Commedia Dell'Arte Mask
    • Make Your Own Clown Hat
    • Clown Clothes
    • Make Your Own Clown Wig
    • Clown Bow Tie
  • At The Circus
    • All Aboard The Circus Train
    • Clown Finger Puppet
    • Clown Paper Bag Puppet

Fun Fact!

The first recorded female circus clown was named Amelia Butler. She performed in Nixon’s Great American Circus and Kemp’s Mammoth English Circus in the 1850s.

Craft: Make Your Own Commedia Dell'Arte Mask

Materials

  • Plaster cast tape
  • Petroleum jelly
  • modelling clay
  • Scissors
  • Warm water
  • Headband to hold back hair
  • Old sheet to cover clothes
  • Newspaper
  • Paint primer
  • Paint

Note: This craft will take several days to complete.

Instructions

Making The Mask Body

This craft requires that kids work in pairs. One partner acts as a model while the other partner makes the mould. The model should wear a headband to hold back their hair so that it does not get stuck in the plaster cast tape. You may want to lay some newspaper across the floor because this craft can get a little messy!

Cut the plaster cast tape into strips. Be careful to keep the strips away from water until you are ready to apply them to the face, as dampening the strips will cause them to harden. Apply petroleum jelly to the face so that the mask, when hardened, won’t get stuck. Be sure to apply lots of jelly to the eyebrows and hairline.

Dip your strips of plaster cast tape in warm water and lay them across the model’s face. Begin by laying the strips so that they outline the contour of your mask area. It’s up to you how much of your face you want the mask to cover (Tip: Commedia dell’Arte masks typically covered half the face; the forehead, nose, and cheek bones). Lay the strips so that the side of the tape with more plaster faces out. Spread the plaster all around the mask so that the strips stick together. Then, cover the entire mask area with tape...but leave openings for the eyes and nose! Lay three layers of tape over the face so that the mask is strong. Your mask will be strongest if you repeat the original pattern and apply extra tape to narrow places like the bridge of the nose.

The model will then have to stay still for 10-15 minutes while the plaster cast tape hardens. When the mask has hardened, carefully remove it from your partner’s face. Your partner can help loosen the mask by tilting their head forward and scrunching their face. When you remove the mask, set it on an elevated surface so that it maintains its shape. Try setting the mask on some scrunched-up balls of newspaper. Let the mask dry for 24 hours.

Making The Mask Nose

A defining feature of the Commedia dell’Arte mask is the nose! Take some modelling clay and shape it into the kind of nose you want. The modelling clay acts as a mould for your mask’s nose. Below are some examples of Commedia dell’Arte masks that you can use when shaping your clay.

Stick the modelling clay through the nose hole. Tip: It helps if you insert the nose from behind, as seen in the picture. Spread petroleum jelly all over the nose and apply 3 or 4 layers of plaster cast tape over the modelling clay to create the nose shape. Let the tape harden for about half an hour.

Then, dig the clay out from the nose. If the nose dries with the clay in it, the mask will be too heavy to wear! Set your mask aside and let it dry for a day before you begin decorating

Decorating Your Mask

It’s up to you how you want to decorate your mask! But first, cover the mask in paint primer so that the paint will apply more easily to the mask. Then, be as crazy and creative as you want. There are no rules!

Craft: Clown Bowtie

Materials

  • 1 sheet of construction paper
  • 1 paper clip
  • Stickers, glitter, and other decorating materials

Instructions

  1. Take a piece of construction paper and fold it in half.
  2. Cut a triangle, making sure that one of the points is attached to the fold.
  3. Unfold the paper and you should have a bow tie!
  4. Decorate it using stickers, glitter, construction paper circles—anything you want! Use a paper clip to clip your bow tie to your shirt.

Craft: All Aboard The Circus Train

Materials

  • Coloured paper
  • Scissors
  • Glue
  • Pencil
  • Craft foam shapes, stickers, glitter and other decoration materials
  • Popsicle sticks

Instructions

  1. To begin, draw your favourite circus performers or animals, or use the templates provided on the next page. Colour and decorate your circus performers any way you’d like!
  2. Making the circus train is very easy! To make the train cars, take coloured paper and fold it to create a pouch for an animal or circus performer to sit in.
  3. Then, draw the rectangular outline of the car. Use your biggest animal or performer to estimate how big your train cars should be (you can also make your train cars different sizes if you would like).
  4. Make sure that the cars have enough room for the circus troupe to slip easily in and out. Cut out the cars from the paper, making sure that the bottom of the car is the folded side of the paper. Cut out circles from black construction paper to make wheels and glue them to the bottom of the train cars.
  5. To make the train engine, fold another piece of coloured paper in half. Then, using different coloured pieces of construction paper, cut out 2 rectangles, 2 circles, 1 triangle, and 1 square. Open the folded paper and glue all the other shapes except the circles onto the inside. Then, close the folded paper and glue the circles to the bottom to make wheels.
  6. To connect the train cars, glue Popsicle sticks along the inside of the paper folds. You can then use stickers, glitter, decorating foam, or any other decorating material you would like to make your circus train look as whimsical and exciting as you want!

Craft: Clown Finger Puppet

Materials

  • Paper 
  • Scissors
  • Pencils, markers, pencil crayons, etc. (optional)

Instructions

  1. Draw or print out a picture of a clown (this craft works best if you use an image that shows the clown’s face, arms, and torso).
  2. Cut out two holes on the clown’s pelvis. Make sure that the holes are big enough for you to stick your pointer and middle finger through, because they will be the clown puppet’s legs!
  3. Stick your fingers through the holes and move them to make your clown dance, walk, and jump.
  4. You can decorate the puppet any way you like using markers, pencil crayons, or any other decorating materials.

Craft: Clown Paper Bag Puppet

Materials

  • Paper lunch bag
  • Scissors
  • Glue
  • Crayons, markers, coloured pencils

Instructions

  1. This is a funny twist on your classic paper bag puppet.
  2. The smooth side of the paper bag is the clown’s back, and the other side of the bag with the flap is the front. You insert your hand into the paper bag and curl your fingers around the flap (the flap is the bottom of the paper bag when it is open). When you move the flap with your fingers, it looks like a talking mouth.
  3. To make the clown’s hat, face, and arms, you can draw them yourself or use the templates provided on the next page.
  4. Colour in the different template pieces and cut them out. Glue the eyes, nose, cheeks, and eyebrows to the rectangular flap on the puppet’s front. Glue the collar and mouth beneath the flap. Glue the hair so that it frames the face, and glue the hat on top. Glue the buttons down the front of the puppet. Glue the arms in the creases on the sides of the paper bag.

Recipe Overview

  • Clown Face Cupcakes
  • Cranberry Clown Cocktails
  • Clown Nose Cookies
  • Circus Popcorn
  • Circus Snack Mix
  • Slippery Banana Split
  • Circus Merry-Go-Round

Fun Fact!

Modern clowning was largely influenced by Commedia Dell’Arte in 16th-century Italy. Commedia dell’Arte (meaning Comedy of Artists) was a kind of theatre where comedy troupes would travel across Europe and perform for people in the streets. Their shows were improvised, meaning that they did not use a script. Commedia used stock characters, meaning that there was a cast of characters that every Commedia dell’Arte group used in their skits. The characters were generally divided into three groups: Masters, Servants, and Lovers. The Servants would try to cause mischief, and the Masters would struggle to keep up appearances. Meanwhile, the Lovers would be caught up in their own world of romantic troubles. For audiences of the 16th century, watching a Commedia show was like watching a TV show with a cast of characters they all knew and loved.

Recipe: Clown Face Cupcake

Materials

  • Cupcakes
  • White frosting
  • Red frosting
  • Cotton candy
  • Red gum drops
  • Sugar cones
  • Yellow banana candies
  • Marshmallow stars
  • Mini M&Ms
  • Wintermint candies
  • Coloured nonpareils (or sprinkles)

Instructions

  1. Everybody wants to be a clown, but everybody will also want to eat these Clown Face Cupcakes! They’re easy to make and even easier to enjoy.
  2. Begin with a cupcake of any flavour. The cupcake should be regular or large-sized, as you want the sugar cone to rest comfortably on top. Begin by frosting the cupcake with white frosting; this will be your clown’s face.
  3. Next, lightly frost the sugar cone and roll it in the coloured nonpareils so that it is covered. Nonpareils are little, round sugar candy balls—but you can use any kind of sprinkles! Stick a red gum drop on the point of the sugar, and there you have your multi-coloured clown hat. Stick the hat onto the top of the cupcake, close to one of the edges.
  4. Take two tufts of cotton candy and put one on each side of the hat to make the crazy clown hair.
  5. Now, for the clown’s facial features, use the marshmallow stars as eyes and place a mini M&M in the middle of each marshmallow as pupils. Use another red gum drop as—you guessed it— the big red clown nose. On either side of the nose, place a Wintermint candy so that the cupcake clown has rosy pink cheeks. Then, use a yellow banana candy for the clown’s smiling mouth. Outline the mouth with red frosting to create big, exaggerated clown lips. There you will have a happy clown face smiling back at you!

Recipe: Cranberry Clown Mocktail

Ingredients

  • Orange juice
  • Pure grape juice
  • Cranberry cocktail
  • Sugar
  • Fruit slices (orange, peach, grapes, pineapple, etc.)
  • Colourful bendy straws
  • Drink umbrellas
  • Skewers
  • Unusual-shaped drinking glasses

Instructions

  1. This drink is as refreshing as it is fun. Mix equal parts orange juice, pure grape juice, and cranberry cocktail; there you have your tasty drink.
  2. The real clowning around is in the presentation! Dip the rim of your drinking glass in lemon juice and then dip the rim into sugar until it is nicely coated.
  3. Garnish your drink with some wacky decorations, such as drink umbrellas and colourful straws that you can bend into interesting shapes. Stick some fruit slices onto a skewer—any fruit you like will do. Orange slices, peach slices, pineapple slices, and grapes work well as drink garnishes.
  4. Sip and enjoy!

Recipe: Clown Nose Cookies

Materials

  • Sugar cookie dough
  • Red icing
  • Red sanding sugar
  • Popsicle sticks
  • Round cookie cutter

Instructions

  1. Here’s a clown prop you can snack on!
  2. Use a roll of pre-made sugar cookie dough or your own cookie dough recipe. Cut the dough into circles using a round cookie cutter.
  3. Insert a Popsicle stick into the side of the cookie to create a lollipop effect, and then bake the cookies in the oven. When the cookies are baked, set them aside to cool.
  4. Once cooled, ice them with red icing and sprinkle them with red sanding sugar. Hold your cookie up to your nose, and behold, a clown nose that’s good enough to eat!

Recipe: Circus Popcorn

Ingredients

  • 6 Cups of microwave popcorn
  • 2 Cups of chopped salted pretzels
  • 1 Cup of granulated sugar
  • 1/2 Teaspoon of sea salt
  • 1/4 Cup of water
  • 1/3 Cup of heavy cream
  • 1 Cup of miniature marshmallows
  • 1 1/2 Cups of M&Ms
  • Medium Saucepan
  • Rubber spatula

Instructions

  1. What better way to enjoy a funny clown performance than to watch it while snacking on some caramel corn trail mix?
  2. Pop the popcorn according to the directions on the bag. Mix the popcorn in a bowl with the pretzel pieces and set it aside.
  3. Pour the sugar, salt, and water into the medium saucepan. Cook it at medium-high heat so that it boils. Let your sugary water mixture boil for about 8-12 minutes; you will know the mixture is ready when it becomes that familiar amber caramel colour! At this point, remove the saucepan from the heat. Pour the heavy cream into the mixture slowly and carefully. The mixture will bubble up, but don’t be alarmed!
  4. Add the marshmallows and vanilla extract and stir the mixture until the marshmallows are melted and the mixture is nice and smooth.
  5. Pour your caramel concoction over the popcorn and pretzels in the bowl. Add the M&M’s and any other candy you would like to add! Stir it all together until the popcorn is nicely coated.
  6. Sit back and snack while you laugh!

Recipe: Circus Snack Mix

Ingredients

  • Microwave popcorn
  • Animal crackers
  • Raisins
  • Dried fruit pieces (apricots, bananas, pineapple, etc.)
  • Chocolate-covered almonds and peanuts
  • Yogurt-covered raisins

Instructions

  1. This two-step healthy Circus Snack Mix is sure to be a crowd-pleaser!
  2. Microwave the popcorn according to the directions on the bag. The next part is easy—mix all the ingredients in with it and enjoy!
  3. If someone in your group has a nut allergy, you can substitute the chocolate-covered almonds and peanuts for chocolate or yogurt-covered raisins.
  4. It’s up to you what quantity of each ingredient you want to include; the key is to have fun with it!

Recipe: Slippery Banana Split

Ingredients

  • 1 Scoop vanilla ice cream
  • 1 Scoop strawberry ice cream
  • 1 Scoop chocolate ice cream
  • Banana
  • Whipped cream
  • Chocolate sauce (or hot fudge sauce)
  • Strawberry sauce
  • Maraschino cherry
  • Walnuts (optional)

Instructions

  1. Scoop vanilla ice cream, strawberry ice cream, and chocolate ice cream into a bowl. Your banana split will look extra cool if you use an oval bowl and place the ice cream scoops in a line.
  2. Take one big banana, peel it—slipping on the peel is optional!—and split it in half. Place one half on either side of your scoops of ice cream.
  3. Pour some chocolate sauce (or hot fudge sauce if you would prefer) over the ice cream and drizzle some strawberry sauce over that. Add some walnuts for a bit of added crunch.
  4. Top the sweet banana split with a spray (or two or three), or whipped cream and a bright red maraschino cherry.

Recipe: Circus Merry-Go-Round

Ingredients 

  • Animal crackers
  • Peanut butter
  • Red apple
  • Pretzel sticks
  • Strawberry

Instructions

  1. Cut two 1⁄2 inch circular pieces out of the apple. They should look like flat disks.
  2. Stick four pretzel sticks into the bottom apple slice—this will prop up the top apple slice.
  3. Use peanut butter to stick the animal crackers to the pretzel sticks.
  4. Top off your healthy merry-go-round by cutting the top off a strawberry and sitting it on the top.
  5. Now you have a whimsical merry-go-round that is fun to look at and even more fun to eat!

Games And Activities Overview

  • Put On A Show
    • Circus Parade
    • Clown Jokes
  • Carnival Games
    • Knockdown
    • Pluck A Duck
    • Bean Bag Toss
    • Bottle Bowling
    • Face Painting
  • Clown Skits

Game: Circus Parade

Materials

  • Clown costumes
  • Face paint
  • Music and/or musical instruments

Instructions

Circuses would often hold a parade before they put on their show. Have your own circus parade! Dress up in wacky clown costumes, bang on drums or toot kazoos and go on the silliest walk of your life.

Game: Clown Jokes

Why did the clown go to the doctor?
Answer: Because he was feeling a little funny!

I’d like to take over the clown’s job.
Answer: Those are big shoes to fill!

Why was the clown sad?
Answer: She broke her funny bone!

Why did the clown wear loud socks?
Answer: So their feet wouldn’t fall asleep!

Did you hear about the fire at the circus?
Answer: It was in-tents!

What happened to the elephant that ran away with the circus?
Answer: The police told him to bring it back!

Game: Knock Down

Materials

  • Tin cans or paper cups
  • Tennis ball

Instructions

  1. Stack the tin cans or paper cups into a pyramid formation.
  2. Each person gets three balls and three shots at knocking down the pyramid.
  3. If someone knocks down at least 3 cans or cups, they get a little prize.
  4. Whoever knocks down the entire pyramid wins a big prize.

Game: Pluck A Duck

Materials

  • Rubber ducks
  • Black permanent marker
  • A large bin or wading pool
  • Water

Instructions

  1. Use a black permanent marker to mark the bottom of some of the ducks with a dot or an X.
  2. Fill a large bin or a wading pool with water.
  3. Float the ducks in the water. Have someone pluck a duck out of the water.
  4. If the duck has a mark on the bottom, the person wins a prize.

Game: Bean Bag Toss

Materials

  • Bean bags
  • Bucket or hula hoop

Instructions

  1. Place a bucket on the ground.
  2. Have contestants take turns trying to toss three beanbags into the bucket.
  3. The size of the prize they get depends on how many beanbags they get in the bucket.
  4. Use a hula hoop instead of a bucket if you want to make the game easier.

Game: Bottle Bowling

Materials

  • Empty 2-litre pop bottles
  • Tennis ball

Instructions

  1. Set up 6 or more empty 2-litre pop bottles in the standard triangle bowling formation.
  2. Contestants take turns rolling a tennis ball (or a bigger ball if you want to make the game easier) at the bottles.
  3. If they knock some of the bottles down, they get a little prize. If they knock all the bottles down, they get a special prize.

Game: Face Painting

Materials

  • Face paint
  • Designs or stencils (optional)

Instructions

  1. This can be done individually or in pairs. Use face paint to make yourself or a friend look like a clown or maybe a circus animal!
  2. You can try to copy designs or use stencils to paint shapes onto your face.
  3. Be as creative as you would like! Popular looks are clown faces, tiger faces, butterflies, stars, and triangles (think Joseph Grimaldi!).

Game: Clown Skits

These scenes can be performed either with or without dialogue. If you want to use dialogue, work in a group to script your performance. If you want to perform the skit mime style, try using music and sound effects to create the mood and to communicate the story to the audience. Remember to use big facial expressions and exaggerated body movements!

Tip: Things do not always go as planned during a performance. If something happens that doesn’t follow the script, don’t panic—improvise! You can make it up as you go along; all it takes is some imagination. Pay attention to your partners and let your natural sense of humour produce a hilarious skit.

Scene #1: Invisible Wall

CLOWN 1 and CLOWN 2 take a walk together. They joke around, laugh, and playfully shove each other. All of a sudden, CLOWN 1 walks into what appears to be an invisible wall and falls backward. CLOWN 1 rubs their head in pain while CLOWN 2 bursts out laughing at them. CLOWN 2 makes fun of CLOWN 1 for falling over, not realizing that CLOWN 1, in fact, walked into an invisible wall.

CLOWN 1, annoyed at CLOWN 2, hops to their feet and tries to explain to CLOWN 2 what happened. At first, CLOWN 2 thinks that CLOWN 1 is making the story up. The two clowns argue back and forth for a bit. Finally, to prove that CLOWN 1 is lying, CLOWN 2 runs at the invisible wall—and is knocked backwards. CLOWN 2 rubs their head in pain while CLOWN 1 laughs at them.

When CLOWN 1 is done laughing, they help CLOWN 2 get to their feet. The clowns begin to investigate the mysterious invisible wall. They touch it, they knock on it, and they put their ears up against it and listen through it. They try to walk around it, but they can’t. Discouraged, CLOWN 2 drops to the ground and sits with their back against the invisible wall. CLOWN 1, sad to see their friend discouraged, keeps investigating. After a moment of more experimenting with the wall, CLOWN 1 comes across an invisible doorknob.

Excited, CLOWN 1 taps CLOWN 2 on the shoulder and shows it to them. At first, the clowns are nervous about opening the door. They are not sure what they will find on the other side. They begin to argue over who will turn the doorknob and open the door. Finally, they decide to do it together. They both place a hand on the doorknob, count to three, and open the door.

Together, the clowns take a big step through the door. When they get to the other side, they stop and look around. They find that this side looks the same as the other side. They feel around for the invisible wall but find that it has disappeared. Confused but happy that they worked together to solve the problem, the clowns continue on their way.

Scene #2: Missing Lollipop

CLOWN walks onto the scene, looking confused. CLOWN paces back and forth across the scene, looking for something they can’t find. Suddenly, CLOWN stops and notices the audience. CLOWN asks the audience if they have seen the lollipop CLOWN lost. CLOWN approaches a couple of individual audience members and asks them if they have seen CLOWN’s lollipop.

CLOWN scratches their head and looks around. CLOWN turns their back to the audience to reveal that their lollipop is, in fact, stuck to their back. At this point, the audience will probably laugh and tell CLOWN that the lollipop is stuck to their back. “On my back?” CLOWN asks.

CLOWN struggles to look over their shoulder at the lollipop. CLOWN tries to reach the lollipop, but can’t. CLOWN runs in circles after the lollipop like a dog chasing its tail. After a few minutes of struggle, CLOWN is still unable to reach the lollipop. Suddenly, CLOWN realizes that there is an entire audience of people who can help them remove the lollipop.

CLOWN goes up to an audience member and asks them for help. CLOWN is very happy to have the lollipop in their hands again. CLOWN stops. CLOWN looks at the lollipop, then the audience member, then the lollipop again. CLOWN decides to give the lollipop to the audience member to thank them. CLOWN waves goodbye and leaves.

Scene #3: I Want That Hat

CLOWN 1 walks onto the scene wearing a fancy hat. CLOWN 1 is very proud of the hat; they show it off to the audience. CLOWN 2 walks onto the scene and notices CLOWN 1’s hat. CLOWN 2 asks CLOWN 1 if they can try on their hat. CLOWN 1 refuses. CLOWN 2, grumpy that CLOWN 1 would not share the hat, storms off the scene. CLOWN 1 admires the hat for another moment. Suddenly, CLOWN 1 yawns, feeling sleepy. CLOWN 1 decides to take a nap.

While CLOWN 1 is sleeping, CLOWN 2 comes back onto the scene. CLOWN 2 decides to try to steal the hat while CLOWN 1 is asleep. CLOWN 2 tiptoes up to CLOWN 1 and is about to grab the hat when CLOWN 1 snores loudly and shifts in their sleep. CLOWN 2 quickly retreats. CLOWN 2 decides to try a different method. CLOWN 2 runs off the scene for a moment and returns with a fishing pole. Carefully, CLOWN 2 tries to hook the hat with the fishing pole, but accidentally tickles CLOWN 1 with it. CLOWN 1 fidgets in their sleep and starts laughing, but then returns to a deep slumber. CLOWN 2 discards the fishing pole and runs off the scene for a moment, returning with a big paper fan. CLOWN 2 tries to blow the hat off his friend’s head using the fan. CLOWN 1 begins to shiver, but the hat stays put. CLOWN 2 discards the fan and slumps, feeling discouraged. Suddenly, CLOWN 2 gets an idea. CLOWN 2 leaves the scene with a skip in their step.

A moment later, CLOWN 1 wakes up, yawning and stretching. CLOWN 1 stands up and begins admiring their hat again. After a moment, CLOWN 2 returns to the scene wearing an even fancier hat. CLOWN 1 is amazed by the hat. CLOWN 1 takes off their own hat and asks CLOWN 2 if they can try the hat on. CLOWN 2 pretends to think for a moment. CLOWN 2 agrees to let CLOWN 1 wear the hat, on the condition that they trade hats. CLOWN 1 hastily agrees. The two clowns, sporting each other’s hats, happily exit the scene together.

Scene #4: Tug-Of-War

CLOWN 1 and CLOWN 2 walk onto the scene. They are bickering about who is stronger. CLOWN 1 flexes their arm muscles to show off. CLOWN 2 scoffs and pushes CLOWN 1’s arm away. CLOWN 2 flexes their own muscles. CLOWN 1 is unimpressed and scoffs at CLOWN 2. CLOWN 1 picks up a chair and lifts it over their head. CLOWN 2, rising to the challenge, stacks two chairs and lifts them both over their head.

CLOWN 1 stacks three chairs on top of each other and tries to lift them up—they struggle a bit under the weight. CLOWN 2 also tries to lift three stacked chairs and struggles as well. CLOWN 1 sets the chairs aside in a huff and tells CLOWN 2 to come closer. CLOWN 1 wraps their arms around CLOWN 2 and tries to lift them up, but fails. CLOWN 2 pushes CLOWN 1 off and laughs at them. CLOWN 2 wraps their arms around CLOWN 1 to try and lift them to show off, but fails because they are too weak as well. The two clowns are embarrassed and frustrated.

Suddenly, CLOWN 2 gets an idea. CLOWN 2 pulls a rope out of their pocket. The clowns decide to settle their disagreement over a tug-of-war. They each take a piece of the rope and take steps backward until the rope is taught. They tug on the rope with all their might. CLOWN 1 starts to lean forward. CLOWN 2 gets excited, but then they begin to slip and lean forward instead. This goes back and forth for a bit. The clowns both hold their ends of the rope over their shoulders and turn away from each other. They try to take steps away from each other and pull the rope that way. 

CLOWN 3 walks onto the stage and sees CLOWN 1 and CLOWN 2 playing tug-of-war. CLOWN 1 and CLOWN 2 are so caught up in their competition that they do not notice CLOWN 3 is even there. CLOWN 3 is amused by their friends and decides to play a prank. CLOWN 3 sneaks up to the rope between the other two clowns. CLOWN 3 pulls a pair of scissors out of their pocket and holds them at the rope.

CLOWN 3 looks to the audience and asks if they should do this—goaded on by the audience, CLOWN 3 cuts the rope. CLOWN 1 and CLOWN 2 stumble away from each other while CLOWN 3 laughs. At first, CLOWN 1 and CLOWN 2 are confused. They become frustrated and wonder which one of them won. CLOWN 3 sees that their friends are upset and decides to solve the problem. CLOWN 3 explains that they were watching the tug-of-war and that they saw CLOWN 1 and CLOWN 2 both tug with so much strength that the rope snapped.

CLOWN 3 explains that CLOWN 1 and CLOWN 2 must both be equally strong. CLOWN 1 and CLOWN 2 look each other up and down while they consider this explanation. They agree that it must be true. CLOWN 1 and CLOWN 2 give each other a powerful handshake and make up. The three clowns amicably exit the scene.

Extra Activities and Supplementals

Once you have finished this challenge kit, use code ECK017 for 20% off the Be A Clown badge!


Sara McGuire

This Meeting Plan was researched and written by our intern Sara McGuire.


  • Share:

Search Our Blog


@2025 E-Patches & Crests is a private enterprise not affiliated with Girl Guides of Canada.
This site is not sponsored, endorsed or approved by Girl Guides of Canada or any Provincial Council.
Checkout

Total 0